I also posted this in
another thread, but I'm putting it here so I can more easily reference it later.
My bed (slide) frame was bending, and looked very much like this pic from the thread referred to above:
I fixed this almost exactly two years ago, and we've had close to 100 nights on the bed with what I'm guessing is 50 in/out cycles. Of the three slides in my rig, this one is now by far the smoothest.
If anyone else wants to try to tackle this on their own (e.g., out of warranty), here's some pictures of the rollers under the bed before and after my improvements.
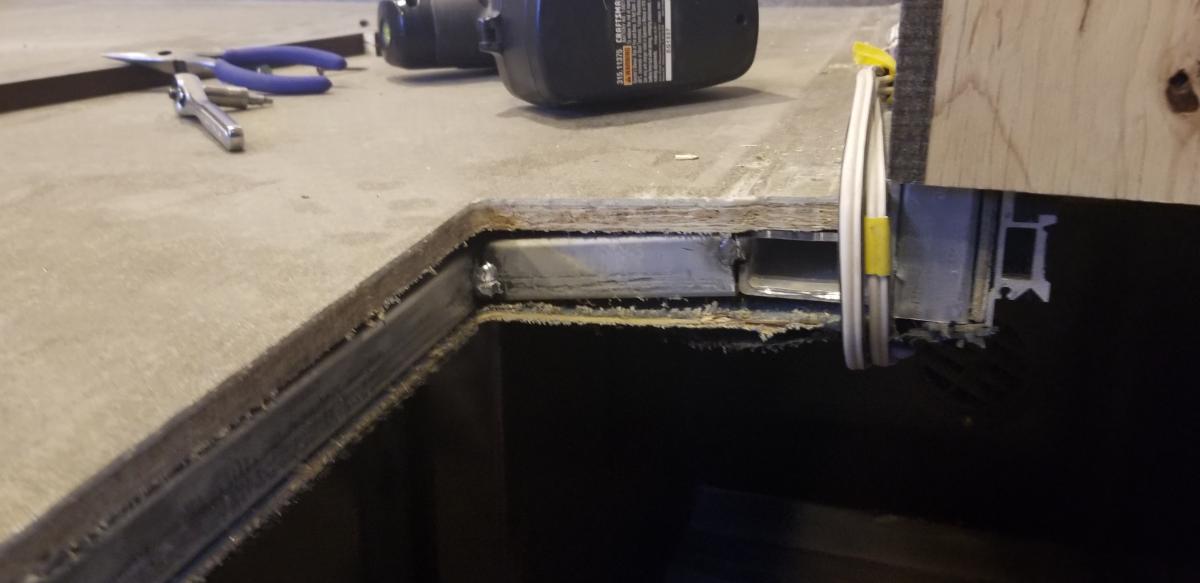
Here's what it looked like underneath originally, which explains why the slide/bed frame started to tweak/bend on the outer cutouts (see the OPs pics). It's actually not the roller bracket that's bending, it's the frame member because it's soft pine and only held together by staples. Bed slide is out, and you're looking inside the cabinet under the bed where the electrical rat's nest is housed. There is a cut-out (my hand is above it), so when the slide is out and the bed-lift is up, you can access to the rat's nest.

Here's the other side with the roller removed. If you look closely, you can see the top is tilted a little forward.

And the roller was only held on by a handful of short #10 screws.

Here's my fix - a 1/2" piece of plywood, cut to size and glued+screwed into the frame (very rigid now). The roller was reattached with some lag bolts and washers. The lower screws are likely unnecessary, but added to keep it from slipping down should the lag bolts loosen up at all. Note this pic was taken with the slide in.

And because it wouldn't be one of my projects if I didn't introduce some overkill, so I added some extra rollers at the end of the cabinet because the bed really needs some extra support when the slide is in. It also helps quite a bit to support the end of the bed when it's out as well. What you don't see is another piece of plywood to make an L with the one you do see. The screws go through the roller bracket, through the plywood you see and into the edge of the one on the backside of the face frame. The one on the back side is screwed to the face frame to give some extra strength to the corner. It was also the easiest way I could come up with to attach the roller without doing something like removing the slide or tearing apart the face frame. Due to what I've done, most of the weight is transferred to the vertical face frame piece. Note this pic was taken with the slide in.

I wound up lifting the end of the bed something like 3-4" because it was sagging that much (almost hitting the cabinet frame), and flexing each and every time we ran the slide in/out. The entire slide+bed is perfectly level with the cabinet now, which is level with the floor and the entire bed is rock solid, either in or out.


 Linear Mode


